Wednesday, February 8, 2012

One Yard Wednesday - Vintage Inspired Apron

A lovely, vintage inspired apron - perfect for St. Valentine's Day!

If you didn't get the chance to visit Between U & Me yesterday when I was guest posting, here is the project for our wonderful One Yard Wednesday.  We will be using a pillowcase and about a yard of gingham.  Feel free to mix and match fabrics as you choose to either coordinate or match your pillowcase, or what's available in your stash.  No pillowcase?  You can find out how to make one here, and use your stash or other repurposed fabric to make one.


 I found this vintage apron:

 in this awesome book.

As soon as I saw it, I knew I had to try to make that apron for myself.  So just like all my other projects, I had to mentally pull apart the pieces to decide what made this apron so special.  Well, of course, the obvious attraction is that cross-stitching, which I'm sure was done by hand.  What a great way to accent that beautiful green gingham!  And I also liked how it was fitted, like a pencil skirt, instead of either just flat across the waist or gathered.  That makes it seem so classy and elegant, instead of so "everyday" - don't you think?!

So let's get started...

In addition to the pillowcase and gingham fabric, you will need thread that matches your pillowcase (mine was white), and thread that coordinates with your gingham or contrasting/coordinating fabric (mine was red).  You will also need a rotary cutter, ruler and mat, and a sewing machine, and you need to know how to use them (and safely!).  Have your iron and ironing board handy, too.  Oh, and pins would be pretty useful.  Well, actually necessary this time.

Remove the sewn end of your pillowcase.

And remove the hem.


Save the hem pieces for later - you'll see why in a little bit.

Next, we're going to trim it to a size that will fit across the front of your body and about halfway around the sides.  Like to where the seams are for your jeans.  I wanted the apron to cover the front of me, from just below my natural waist (because we'll be using a good-sized waistband), to just above my knee, leaving room for a nice-sized gingham hem.  Also, because my pillowcase was a pretty sheer white, I wanted it to be doubled.  This would give the apron a stability boost, too.  For me, this measurement was 33" by 25 1/2".  If you need to change measurements to fit you, feel free.  It's an apron.  This is good practice for newer sewists.  You may want to ask a friend or neighbor to help you meaure, or if you have to do it by yourself, lay your favorite pair of pants on the floor and measure on them.  Remember, our end product is going to be straight and fitted like the front part of a pencil skirt.  And it's an apron.  An extra half inch (or short a half inch) is not the end of the world.  Running out of chocolate is.


 Now, cut your gingham pieces per the diagram.

Here you can see how I cut the different widths and labeled everything so my poor over-40 brain could keep them straight.

 Now, it's time to start pressing.  Let's begin with the hem.  Fold it in half, wrong sides (the inside or back) together, and press.
 Match the raw (unpressed) edges to the bottom edge of your main apron fabric.  Stitch together using a 1/4" seam.  Press the seam toward the gingham.
 Next step is making a rolled hem on the side edges of the apron.  Press under 1/4".
 Then, fold over and press again.
 Stitch these side hems in place - just a straight stitch is fine.  I didn't even do the forward-back-forward reinforcing.  Try to stitch in the center of the hem.  I also stitched on the right (front) side.

This is where we start building that pyramid shape.  Or birthday/wedding cake if you prefer.  On the remaining gingham rectangles that are 3 1/2" wide, press each edge under 1/4".  Top stitch these into place after pressing.  I used my white thread to do this, so the stitching would blend into the gingham better.  On your apron, you decide which thread to use.

Take the longest of these rectangles, and press it in half.  Fold the main body of your apron in half, and match the centers, and also try to match the lines of the plaid.  If your rectangle goes one way or the other just a little, it's ok.  People will notice that less than the plaid going zigzag.  Think handcrafted versus homemade.  Yeah, it's one of those crazy little details.  You'll be thankful in the end - trust me!
 Pin around all 4 edges.  Once it's pinned, topstitch into place.  Again, thread color is your choice.  Repeat with all 3 rectangles.  Here's the finished pyramid/celebratory cake.  Starting to look like the picture, huh?!

 Well, this beauty isn't going to hold itself up without a little help...

For the waistband, take the 8" rectangle that stayed whole, and press one long edge under 1/2" toward the wrong (inside/back) side.  When we attach the waistband to the apron, this will be on the inside, and make a nice, finished edge.
Fold the waistband in half, with the right (outside/front) sides together.  Stitch both short edges, and use a 1/2" seam allowance.

 Clip the folded edge corner (just close to the seam but not through it), and trim the extra fabric from the seam.  Turn and press.  Like this.
 Before we attach the waistband, we need to add the darts, which is our new sewing skill of the week.  "What is a dart?" you ask.  That is an excellent question.  A dart is a glorified long triangle that takes something flat and square, and allows it to curve in all the right places.  If you look at the back of your favorite pair of dress pants, you will probably see a dart.  It probably starts at the waistband and works its way south.  This allows something flat and square (the plain old pant leg) to curve to cover your backside.   We want our apron to curve in the front, so the darts will go in the front.  Here is a close-up of the pinned dart.  Sorry, it's a little blurry, but I think you can get the idea.
 And here is how we make it.  Fold one side edge of the apron to the center, with the right (front) sides facing.  On this folded edge, measure down 3" from the top and mark it with a pin (in the photo above, it's the red one).  From this folded edge, measure in 1/2" and mark with a pin (the gold one).
 Before we start the next step, just take a deep breath and relax.  Aaaaaah - doesn't that feel better?  Making darts makes some people really nervous.  I don't want you to be nervous.  Embrace your new skill, because here we go!  You are going to stitch, in a generally straight line, from your top pin to your bottom pin.  If you want to mark lightly with a pencil or some tailor's chalk or a special marking pen before you stitch, that's ok. Maybe use more than 2 pins.  Whatever will help you get from Pin A to Pin B successfully.  When you are done stitching, press the dart on the wrong (back) side toward the side edge.  The front will now look like this.
 Repeat for the dart on the other side.  If you need/want smaller or larger darts, or you don't want darts at all, feel free to adjust as necessary.

Let's attach the waistband now - the baby will be awake soon, or the kids will be home from school any minute!  Match the long unfolded edge of the main waistband piece to the top edge of your apron, matching the centers.  The waistband will hang off the edge on the sides, and that's ok.
 Stitch together, using a 1/2" seam allowance, and press the seam fabric up toward the waistband.  This is also when you press that bottom edge up (where it's not attached to the apron) 1/2".  It's not tricky, just watch your fingers with the iron.  Fold the already-pressed edge over the top of your seam, and match your waistband edges.  Pin, and use as many pins as you need to keep your edges straight and cover that inside seam.  Topstitch all 4 edges.  Here you can see the back side of the waistband, all stitched into place.
To add the ties, take the remaining two rectangles, and press under all 4 edges 1/2" toward the center of the wrong (inside) side.

 Fold in half, with the wrong sides together, and long edges matching.  Pin as needed, and topstitch all 4 sides.
 Now, my ties are smaller (cutting error - my bad!), so you'll have to pretend a bit.  Overlap the short edges of your ties with the main waistband about 1-2".  You can adjust for the length you want your ties to be.  Plus, remember you have to match the lines of the plaid if you are using gingham.
 Stitch a box, going around all 4 sides of the overlapping rectangle area.

And you can quit here if you'd like.  You have a lovely, fitted apron!  However...

If you want that cool stitched effect, you can play with the decorative stitches on your sewing machine.  Even super basic models of machines usually have some type of zig zag, and I haven't seen a model made after 1970 that didn't come with some type of buttonhole stitch (which is also just a really tight zig zag).  My machine has 3 different cross-stitches, so I decided to try the 2 I use the most to get a general idea of how they'd look.  This is where you put your scrap "main body" fabric and a piece of "accent" fabric together, and you play with thread.  Use a color that you need to use up, or you had to buy for one project and you'll never use again.  Save the good stuff for your apron.  I liked the alternating crosses for the edges, and straight-row crosses the insides.  It seemed to mimic the original in a way I liked.  Choose stitches that you really like for your apron.
 Here is a close-up of the finished stitching on the body of the apron.

I used the straight-line stitching across the areas where the rectangles met, and also around all 4 edges of each waistband piece.  Stitch where it makes you happy.

And here's the finished apron! Sorry, forgot to put my foot up on the wall...

Dig out those pillowcases that are long since past their prime and put them to good use.  Cover stains or wear spots with accent fabric and stitching, and turn something that's "eh" into a "WOW!"

Enjoy your new apron!

Photobucket

Monday, February 6, 2012

GUEST POSTING TODAY - BETWEEN U & ME

I'm so excited to be doing a guest post today over at Between U & Me!  Come on over and join us!

Photobucket

Tea for Tuesday - Crochet Tea Cozy Tutorial - RESCHEDULED

Today's tutorial has been postponed until Thursday - come back and see us then!  Meanwhile, go check out the guest post at Between U & Me!

Pay It Forward - Versatile Blogger Awardees

Coming up with ONLY 15 bloggers to pass this award on to sure beats any other challenge!  And what a great challenge it is!

Michelle - Fun on a Dime
Courtney - Between U & Me

I will be posting comments for them all today - be sure to stop by and say congrats to these lovely folks!
Photobucket

12:22 pm CST - all bloggers have been notified, so #'s 6 and 7 - DONE!

Sunday, February 5, 2012

A SPECIAL AWARD!!!

I am so honored and humbled...

Mlissabeth has presented me The Versatile Blogger Award!


Isn't it pretty?!

The divine Miss M is an inspiration to us all - a two-time cancer survivor who lives with MS everyday.  Such an awesome warrior spirit, and she's so nice, too!  I'm just so thankful to be able to share virtual space with folks like her.

So here are the rules of being presented with the award.

1. Add the award to your blog.   
(done)
2. Thank the blogger who gave it to you.
(done - and I can't say thank you enough)

3. Mention 7 random things about yourself.

(see below)

4. List the rules.

(done)
5. Award to 15 bloggers.
(making a list and checking it twice)
6. Inform each of those 15 by leaving a comment on their blog.
(top priority for these next few days)


So the seven random things about me:
1.  I have been to all 50 states.
2.  I am both a registered girl scout and a registered boy scout.
3.  My two favorite colors are dirt and blue jeans.  And speaking of blue...
4.  All my vehicles have always been blue.  In fact, they've alternated light blue, dark blue...My current vehicle is a light blue that is pretty close to faded blue jean blue.
5.  I have always wanted to learn to speak Italian.
6.  I am a published poet.
7.  I can sing the children's song "Head and Shoulders, Knees and Toes" in 3 languages:  English, French and Japanese.  I can also sing "Old MacDonald" in French.

I have to confess I am really REALLY struggling with my list of 15 bloggers.  There are just sooooo MANY talented, wonderful, generous bloggers out there - can I just say for now I'm giving you all a great big hug and a smooch?  Your work inspired me to start my own blog, and you continue to inspire me every day.  So those last 2 may take me a bit, but I'm honoring my commitment!  When I have my final list in the next few days, I'll post it.

So, if you'll excuse me, please.  I'm going to virtually polish my virtual award and place it with loving care on my virtual mantle.  Pretty cool...

Have a great Monday everyone!

Photobucket

February Craftivism Challenge - Crochet Heart Scarf Pattern and Tutorial

I am soooooo sorry this has taken sooooooo long to get posted!  Did you ever have a week where everything takes 3 times longer than usual, no matter what you do?  That's been the last 4 days of my life.  Hopefully, whatever's up with this time-warp issue has finally been resolved and is on its way OUT THE DOOR!


So as promised, here is the (small fanfare of trumpets) Crochet Heart Scarf Pattern!

Let's get started...

I used a 7-oz. Red Heart Super Saver (most of it), Cherry Red - you can use any acrylic worsted weight yarn you choose, as long as it's red.  I also used a size J (10/6mm) hook.


For our newbie crocheters, we're going to learn how to do a double crochet (dc) with this project.  Don't worry - it's just like I told you, every crochet stitch is just yarn overs and pull-up-a-loop-s.  We're also going to practice repeats within rows (usually written as * to *) and numbers of rows.

Start by chaining 202.

Row 1:  Sc in 2nd ch from hook and each ch across (201 sc).  Remember to hold the yarn tail behind your first few stitches to work it in.  Ch 3, turn.  Yes, 3 ch's.

Row 2:  That ch 3 acts like your first double crochet (dc) of this row.  So now you're going to dc for real.  Skip the stitch that's next to your chain (your chain is replacing this stitch). Yarn over.
Insert hook into next space.

Yarn over,

and pull up a loop, just like you do for single crochet.
 Yarn over again, and pull through 2 loops, just like single crochet.
Do it again.
Now you know why it's called double crochet - you basically make 2 single crochets right on top of each other.

Sc in next stitch. *Dc in next 2 stitches, sc*, rep from * to * across, ending with a sc.  Be extra careful with your counting.  I was talking and watching TV and interrupted and checking the computer.  There are sections of my test scarf that have as many as 5 dcs in a row.  Yeah, no fooling!  So the moral of the story is, you should have 201 stitches (counting the ch 3 as the first dc), and end with a sc.  Now, ch 3 and turn.  Here is a closeup of the pattern.


Row 3:  For this row, instead of doing BIG BIG small, we are going to do small small BIG, and here's how it goes.  Your ch 3 will act as the first dc.  Sc in the tops of the 2 dc in row 2, then dc in the sc in row 2.  Repeat across.  Make your final stitch in the top chain of your turning chain from Row 2.  It's just like making a stitch in your base chain.  After you make that stitch, ch 1, turn.  Make sure you have 201 stitches.

Row 4:  Sc across.  Ch 3, turn.  Do you have 201?

Repeat rows 2-4 four (4) more times.  When you get to the last sc of the final row, make 3 sc in that same stitch.  This will turn your corner.  Working as best you can, sc in ends of the previously worked rows.  You'll remember doing this from when we did the cup cozy.  When you are ready to make the last sc along the side, do 2 sc in the last stitch, and slip stitch to the end stitch on the base row.  Fasten off, and weave end into back of scarf.

Join with a slip stitch to opposite end (where your chain first began).  Sc in ends of rows up to the top row.  Work 2 sc in that final end, and join with a slip stitch.  Fasten off, and weave in the end to the back of scarf. Here is a close-up of the neat texture these alternating rows create.

Now, you have a perfectly lovely scarf.  But maybe you're a fringe girl, or you're thinking your scarf may end up in the hands of a fringe girl.  Not a problem.  We just learned how to do fringe when we made the mug mats.

Since this is fringe for a grown-up, it needs to be a little more substantial than just a single little strand of yarn.  We're going to use 2 strands.  We don't want to be all flashy - just a little fringy.  So let's start by counting the number of sc's you have on each end.  Hopefully you have the same number on each side.  If not, I won't tell.  There are no scarf police!  And I'm so sorry - I have to make you do math.  Take that number and multiply it by 2.  This will be how many fringe strands you need to make.

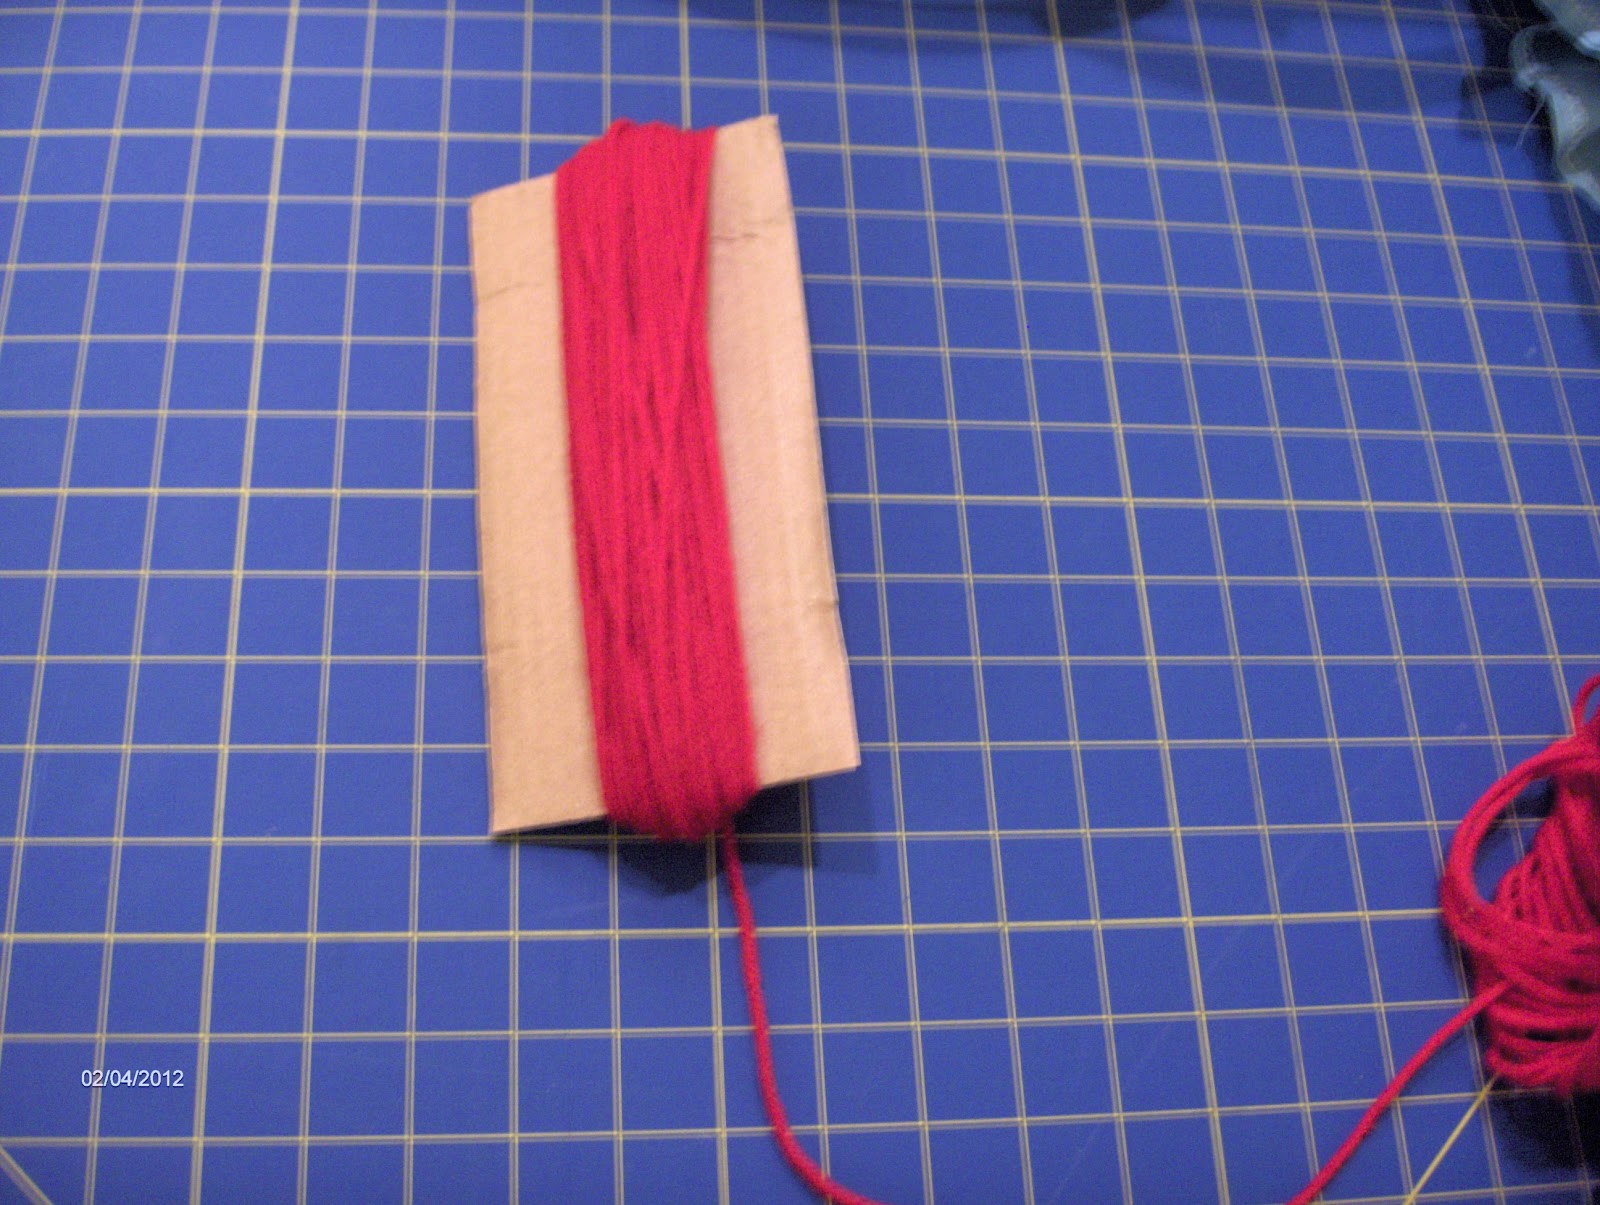
I made my fringe about 8" long.  I used this piece of cardboard, and wrapped my yarn around 72 times.  Then I cut the yarn at that bottom edge - ALL the strands of yarn.  It looked like this:
Part of me thinks this would make some pretty stylin' hair for a punk rock Raggedy Ann doll...

Insert your hook from front to back in the sc's on the ends.  You'll start at one end, then work toward the other.  So take two of those strands and loop them over the hook.  Pull this loop through the sc, then pull the ends through the loop.  Pull tight, and you have your first "fringe".  Repeat all the way across one end, then all the way across the other.  When you get all of them done, straighten them all out by combing through with your fingers.  Line the ends up with a ruler (I used my cutting mat), and trim them all even.

And there you have it!  The great thing about this pattern, and especially the length of this scarf - if you were to make it again, using several skeins of yarn, you'd have a really nice-sized, thick and warm afghan.  Do only 2 repeats for a skinny fashion scarf using a skein of really chunky yarn, and maybe a thin, variegated sock yarn.  Use a metallic yarn.  Play with the number of dc's and sc's - what will happen if you use 2 and 2 instead of 2 and 1?  What about 3 and 3?  What about 3 and 1?  Just so many ways to play!

Oh, and bonus!  Now that you can double crochet, you can make granny squares and you can make shell stitches.  We'll get into that more down the road.  For now, though, celebrate your new stitch and get ready for more fun!  Be proud of you!


Photobucket

Housekeeping

Just some housekeeping items:

  1. Did you register for the giveaway?
  2. On Tuesday, I'm guest posting at Between U & Me, so be sure to join me over there!  Our Tea for Tuesday will be rescheduled for Thursday.
  3. Scarf pattern for our Craftivism Challenge should be posted later this morning.
  4. If you get the chance, take a wander through all the wonderful linky parties and blog hops I post on.  There are lots and LOTS of really talented folks out there who'd love for you to visit and leave some comment love.  You'll also get some amazing recipe, craft and DIY ideas!
  5. I was presented with an award this weekend, and will share more about that tomorrow.
  6. SPH will be on WSPY on 2/28 at 8:30 am - check out the broadcast area on my original post about it, then mark your calendar and tune in!

Enjoy the rest of your weekend!

Photobucket