Showing posts with label pattern. Show all posts

Tuesday, March 20, 2012

Tea for Tuesday - Pottery Barn Inspired Mug Mat

A cool bistro stripe on a cute little mug mat.  Very nautical.  And inspired by a rug...


This is the original rug.  Don't these stripes just SCREAM BEACH to you?  This makes me think of someone's summer home out in the Hamptons, probably on their screen porch that overlooks the water.  Where they sit and sip Long Island Iced Tea.  Before they go have dinner at Ina Garten's house.  But I digress...


So the lesson today is this:  you can find inspiration anywhere.  And when you find it, use it.  Let's use this inspiration to make a mug mat.

You will need graph paper, a ruler to make straight sides, a pencil and eraser, colored pencils, cotton worsted weight yarn in your choice of colors (this is a good way to use up some stash), a yarn needle or small crochet hook, and the size needles you prefer.  Mine are size 7's.

If you see something that catches your eye, and you'd like to make if for yourself but just aren't sure where to start, a graph paper sketch will help you immensely! I've used this technique for everything from quilt blocks, to afghans, and now a mug mat.  I even designed our community garden with graph paper!

So I started with my graph paper to sketch out how I want my "rug" to look.  How many stitches wide?  How many rows long?  How wide do I want the stripes.


This original sketch was 20 stitches wide by 32 rows long.  Then I added the stripes.

You can see that I miscounted where I started, so I had an extra row on the end.  This pattern would have been fine, until I started to knit it out.  Twenty stitches was just not wide enough.  Then as I worked my way through the chart, it just didn't look right.  The rows, as they were sketched, were too narrow.  Now, each row on the chart is two rows in height.

So here's what I came up with:
And here's the pattern:
Cast on 28 stitches.
Rows 1-8:  Knit in ivory.  Change color by looping the blue over your needle.  Leave the ivory attached.


Don't worry if your first stitch seems really loose and sloppy - you can tighten it up in just a minute.  Be sure to leave a tail of the blue yarn about 2" long.
Rows 9-16:  Knit in blue.  Once you get in a few stitches of the blue in row 9, pull the tail of the blue and the connected yarn of the ivory to tighten the stitches.  Not too tight - just enough that they are the same as your other stitches.

Our something new today is how to carry the yarn of another color from one section to the next.  After working row 10, loop your ball of blue under the ivory and up behind it.  This will carry your ivory yarn up to the next section, and hide it pretty well, too.  This side edge will still look pretty finished, which is one of those little details that makes the difference between homemade and handcrafted.  Every time you finish an even number row from here on out, loop your working yarn under the yarn you are carrying.


Rows 17-20:  Knit in ivory.  Do the under and up thing again with the ivory.

Now you will add your third color - the brown.  It's ok - don't panic.  You already know what to do.  Just do the same thing you did with the blue, except now, you have to go under both the ivory and the blue when you get to the end of an even row.  As you continue, you'll have to be careful to not get these side threads tangled.  And they will - trust me.  It happens.  Just take your time with it.

Rows 21-24:  Knit in brown.
Rows 25-28:  Knit in ivory.
Rows 29-36:  Knit in blue.
Rows 37- 44:  Knit in ivory.

Let's look at how to bind this off.  Start by cutting the brown and blue.  You've carried them all the way up here, now it's time to set them free.  Be sure to leave tails that are about 2-3" long.

We'll do a typical knit bind off.  Start by knitting the first stitch.  Pull the tails between this stitch and the next, bringing them to the front from the back.  Knit the second stitch.  Flip the tails to the back.  Pull the first knit stitch up and over the second.  Leave the tails in the back.  Just leave them there.  Continue binding off the rest of the way across.  Cut the ivory yarn, pull the tail through the last loop to make a knot, and you are done.  Work all the tails in on the back side, and trim.

Et voila!  You have a new mug mat!

And let's play my favorite game:  What Else Can You Do with It!  Well, let's start with the basic design.  Make it wider, make it longer.  Do both and make a scarf.  Change the colors.  Do two instead of three.  Do every row a different color to use up your stash.  Make the stripes thicker or thinner.  Add fringe.

Let your imagination and your graph paper be your guide!

Have fun!


Photobucket

Saturday, February 18, 2012

February Craftivism Challenge - Knit HeartScarf Pattern

Let's practice our knitting skills some more, and learn something new...

You will need about 3 balls of Lion Brand Hometown Yarn (or similar super bulky yarn) in red.  Just make sure your bulky yarn is red for the HeartScarf project.  Lion Brand has Tampa Spice or Cincinatti Red in the Hometown.  Red Heart has Red Heart Chunky in Berry Breeze (which appears to be reds and hot pinks on the screen).  I am using a red super bulky which was donated to me by a friend, and the amount is approximately 8 ounces.  You can also hold together 2 strands of worsted weight yarn in red.

You will also need chunky size needles.  Mine are 17's.  I think you could use anything size 13 or above.

So let's start with the basics.  Start by casting on 12.

So the pattern goes like this:
Row 1 (and all odd rows):  Knit across
Row 2 (and all even rows):  K2, p8, k2.  The k2's on each row keep your scarf from curling in on itself.

This pattern (knit one row, purl one row) is called stockinette stitch.  This produces the texture we usually associate with a knit item.  The Special Olympics Scarf we made in November and the dishcloth we made in December are all knit.  This is called garter stitch.  If you ever see these terms in a pattern in the future, you'll know what the designer has intended.  Let me show you a couple samples so you can see what I mean.

This is the back of my scarf (in progress).  It has all the loops/bumps.  This is what garter stitch looks like on both sides.

This is the front of my scarf (in progress).  It has the smooth columns of v's.  This is what stockinette stitch looks like.

Did you catch my crazy trick?  I have made projects in stockinette stitch in the past.  While making them, I would {NEVER} be interruped and then, of course, would {NEVER} forget whether I was knitting or purling.  NEVER - HA!  So, I find a way to mark one of my needles to represent the purl.  In this case, I happen to have 2 sets of size 17's in 2 different colors.  I use the purple for the purl.  You can put a piece of painters' tape or masking tape on the head of your needle, mark a plastic needle with a Sharpie, whatever works for you.

Continue knitting and purling until desired length (60"), knit one row and bind off.

Now, one of the neat things about stockinette stitch is that you can use the v's to do cross-stitch on.  You can stitch on stripes, or shapes (like a heart), or a monogram.  That's if you want to.  I chose not to do that this time.  By the way, if you want the LOOK of argyle (you know, all those really cool diamonds with the intersecting lines), but don't want to try to knit it - think cross-stitch!

If you'd like a fancier border, you can crochet around the edges (like we did for our cup cozy).

Add fringe if you want to. You could use a thinner/lighter weight red for the fringe.

If you need a practical present in a hurry, these are GREAT!  Make a bunch in different colors for all your friends and relations.  Or, make a bunch, then stitch them together to make a nice throw.  Use the basic stockinette pattern with a longer chain to make a baby afghan.  Use smaller needles and lighter yarn or use multiple strands of yarn and Speed Stix (size 50's).

Next weekend, I'll have a linky up again, so we can link to each others' projects.  Come back and link up!

Have fun knitting!


Photobucket

Tuesday, February 14, 2012

One Yard Wednesday - Giant Round Table Cloth

Maybe you have a round table in your house.  Maybe this round table is 20" in diameter.  Or maybe, like my round table, it is bigger.  Like a LOT bigger!


When my mom passed nearly 9 years ago, I inherited an antique table that was hand-built from solid oak by my 3rd-great-grandfather back around the turn of the 20th century.  He was a carpenter.  He also made for himself this amazing tool chest that had sliding trays, and slots for all of his saws.  Obviously he was very skillful!  He also had many children, which brings me back to the table.  To fit everyone around it at dinner time, the table had to be gigantic.  My mom always used a 70" round table cloth on it, and the cloth only hung over the sides by a few inches.  Yeah, it's really that big.  And that's without the 7 leaves that he built to put in it!  Did I also mention it literally weighs about 500 pounds?

So let's fast forward up to today...

The BIG DAY for SPH is coming up, and for the set, I'm allowed to use their picnic table instead of the regular coffee table.  YAY!  EXCEPT that it's octagonal. Oh...

Not to worry - I can just use a round table cloth.  I thought for sure someone in the family had saved my mom's tablecloths.  Nope.  I looked at our local stores.  All they had was vinyl, which may be shiny on camera.

Then, I remembered a trick from a class my mom and I had gone to at Minnesota Fabrics nearly 20 years ago.  Today, I'll share that trick with you.

For today's One Yard Wednesday, you will need a bed sheet.  Old or new won't matter for the technique, but if you are making this to have something nice for when company comes, you may want to consider new. That's what I did.

Also, consider the size of your circle.  It should be big enough to cover the top of your table, then hang down a bit.  This is called the drop.  The table I am covering is 48" across.  I wanted to have a really nice drop to it.  To do this, I used a twin bed sheet, and my circle is 72" across.  Your circle needs to be the diameter of your table PLUS however much you want for a drop (times 2).  I know, it's math.  I'm sorry.

Here's how that would play out with real numbers.  I need my circle to be 48" across.  If I want a 6" drop, then I'd calculate it this way:
48 + (6 x2) = 48 + 12 = 60

No bed sheet?  No worries.  You can take 2 equal lengths of fabric (how long will depend on the size of your circle) and seam them together.  Press the seam open on the back to ensure that your tablecloth will lie flat.  This works well, too, if you have a smaller table - you could easily piece two fat quarters of the same fabric together, then press the seam.

So let's get back to the project at hand...

I used a twin size bed sheet.  I knew from quilting that they are about 70-ish", when you remove the side hems.  It was cheap, too.  And in a color I know will work well with the set at the TV studio.

I washed it, dried it, pressed it and folded it in quarters (half lengthwise, then half width-wise).
I laid it out on my floor to work - remember it's a really big circle, so give yourself plenty of space to work.

Next, cut a piece of sting the length of the radius of your circle (half way across the circle) PLUS 2".  This is my sample piece.  The piece I really used had the extra 2" on it, but this picture gives you an idea of how you can measure it.

With that extra couple inches, tie a slip knot around a pencil or fabric marking pen.
Line up the other end with the corner of your fabric.

Secure this end with painters' tape or masking tape.
Now, you've basically made yourself a compass.  Remember those pointy things from school that helped to draw circles?  Hold the tape end down with your hand (if you can reach), a hubby, a kiddo, a friend, or even a heavy book.  Gently pull the string straight, and move it in an arc.  I used a Sharpie to go over my line so you can see it against the pale sheet.  Also, try to keep your fabric as flat and wrinkle free as possible.

Cut along this line.  Be sure to save your scraps.


You can see how big mine is when I spread it out across my dining room table.

So if you wanted just a circular table topper to just throw over a table, whether the table already had a cloth on it or not, you can stop here.

For something more finished, the last few steps are actually really easy.  Just a rolled hem and stitch it down.

Fold the edge of your circle in about 1/4", and press.  Don't worry if it's perfect, just try your best.

Once you've gotten all the way around, fold in another 1/4".  This process takes a while, so be patient.

At this point, you can simply stitch the hem with a straight stitch.  Be sure that the right side is facing up, so your bobbin threads are underneath.

If you want something fancier, you can choose a decorative stitch on your machine if you have one.  I liked this one, and tested it on some scraps.

You'll notice, if you look closely, that the first several started to pucker.  I adjusted the tension on my machine so that the stitches would stay nice and flat.  Then I tested some thread colors.  I wanted something that coordinated, and I happened to have this color in my stash (it's Boy Scout uniform pants green).  To do the decorative stitching takes a lot more thread than usual, and I was very blessed to have an extra spool of this in my sewing bag.
So this is the step that takes lots and lots and LOTS of patience.  Use your decorative stitch all the way around to finish the hem.  This takes quite a while, so if you need to stop part way around and stretch, do it. Remember (sorry, more math here), the circumference of a circle (the measurement of all the way around) is 3 times-ish the diameter (the measurement across).  For me, that was over 200".  I felt like I was sewing forever!

But, I think you'll agree with me, it's worth it!  Here's the finished cloth, folded again so we could get a good picture.

Here's a close-up of the finished hem.

While I was stitching, my mind began to wander, and I thought of some ideas for this project.  Want matching napkins?  Buy matching pillowcases, and cut squares or rectangles of desired size.  Then, simply hem them the same way.  Repurpose two old bed sheets (same size), following the steps above.  The sheets don't have to be pretty, or even match.  Stains would be ok, but no holes.  When it's time to stitch the hems, pin them together, wrong (back) sides facing.  Now, you have a reversible picnic/beach blanket.  You could throw it over a picnic table, too.  Do the same thing with 2 smaller circles, and use it as a baby throw.  This would be wonderful for going over the handle of a baby carrier.  Make several smaller circles to use as placemats.  Use your jelly roll stash to make binding for the hem for a big pop of color.

Like I said, it took a looooooong time to go around that hem, so I had lots of time to daydream!

Enjoy your new tablecloth!

Photobucket

Sunday, February 5, 2012

February Craftivism Challenge - Crochet Heart Scarf Pattern and Tutorial

I am soooooo sorry this has taken sooooooo long to get posted!  Did you ever have a week where everything takes 3 times longer than usual, no matter what you do?  That's been the last 4 days of my life.  Hopefully, whatever's up with this time-warp issue has finally been resolved and is on its way OUT THE DOOR!


So as promised, here is the (small fanfare of trumpets) Crochet Heart Scarf Pattern!

Let's get started...

I used a 7-oz. Red Heart Super Saver (most of it), Cherry Red - you can use any acrylic worsted weight yarn you choose, as long as it's red.  I also used a size J (10/6mm) hook.


For our newbie crocheters, we're going to learn how to do a double crochet (dc) with this project.  Don't worry - it's just like I told you, every crochet stitch is just yarn overs and pull-up-a-loop-s.  We're also going to practice repeats within rows (usually written as * to *) and numbers of rows.

Start by chaining 202.

Row 1:  Sc in 2nd ch from hook and each ch across (201 sc).  Remember to hold the yarn tail behind your first few stitches to work it in.  Ch 3, turn.  Yes, 3 ch's.

Row 2:  That ch 3 acts like your first double crochet (dc) of this row.  So now you're going to dc for real.  Skip the stitch that's next to your chain (your chain is replacing this stitch). Yarn over.
Insert hook into next space.

Yarn over,

and pull up a loop, just like you do for single crochet.
 Yarn over again, and pull through 2 loops, just like single crochet.
Do it again.
Now you know why it's called double crochet - you basically make 2 single crochets right on top of each other.

Sc in next stitch. *Dc in next 2 stitches, sc*, rep from * to * across, ending with a sc.  Be extra careful with your counting.  I was talking and watching TV and interrupted and checking the computer.  There are sections of my test scarf that have as many as 5 dcs in a row.  Yeah, no fooling!  So the moral of the story is, you should have 201 stitches (counting the ch 3 as the first dc), and end with a sc.  Now, ch 3 and turn.  Here is a closeup of the pattern.


Row 3:  For this row, instead of doing BIG BIG small, we are going to do small small BIG, and here's how it goes.  Your ch 3 will act as the first dc.  Sc in the tops of the 2 dc in row 2, then dc in the sc in row 2.  Repeat across.  Make your final stitch in the top chain of your turning chain from Row 2.  It's just like making a stitch in your base chain.  After you make that stitch, ch 1, turn.  Make sure you have 201 stitches.

Row 4:  Sc across.  Ch 3, turn.  Do you have 201?

Repeat rows 2-4 four (4) more times.  When you get to the last sc of the final row, make 3 sc in that same stitch.  This will turn your corner.  Working as best you can, sc in ends of the previously worked rows.  You'll remember doing this from when we did the cup cozy.  When you are ready to make the last sc along the side, do 2 sc in the last stitch, and slip stitch to the end stitch on the base row.  Fasten off, and weave end into back of scarf.

Join with a slip stitch to opposite end (where your chain first began).  Sc in ends of rows up to the top row.  Work 2 sc in that final end, and join with a slip stitch.  Fasten off, and weave in the end to the back of scarf. Here is a close-up of the neat texture these alternating rows create.

Now, you have a perfectly lovely scarf.  But maybe you're a fringe girl, or you're thinking your scarf may end up in the hands of a fringe girl.  Not a problem.  We just learned how to do fringe when we made the mug mats.

Since this is fringe for a grown-up, it needs to be a little more substantial than just a single little strand of yarn.  We're going to use 2 strands.  We don't want to be all flashy - just a little fringy.  So let's start by counting the number of sc's you have on each end.  Hopefully you have the same number on each side.  If not, I won't tell.  There are no scarf police!  And I'm so sorry - I have to make you do math.  Take that number and multiply it by 2.  This will be how many fringe strands you need to make.

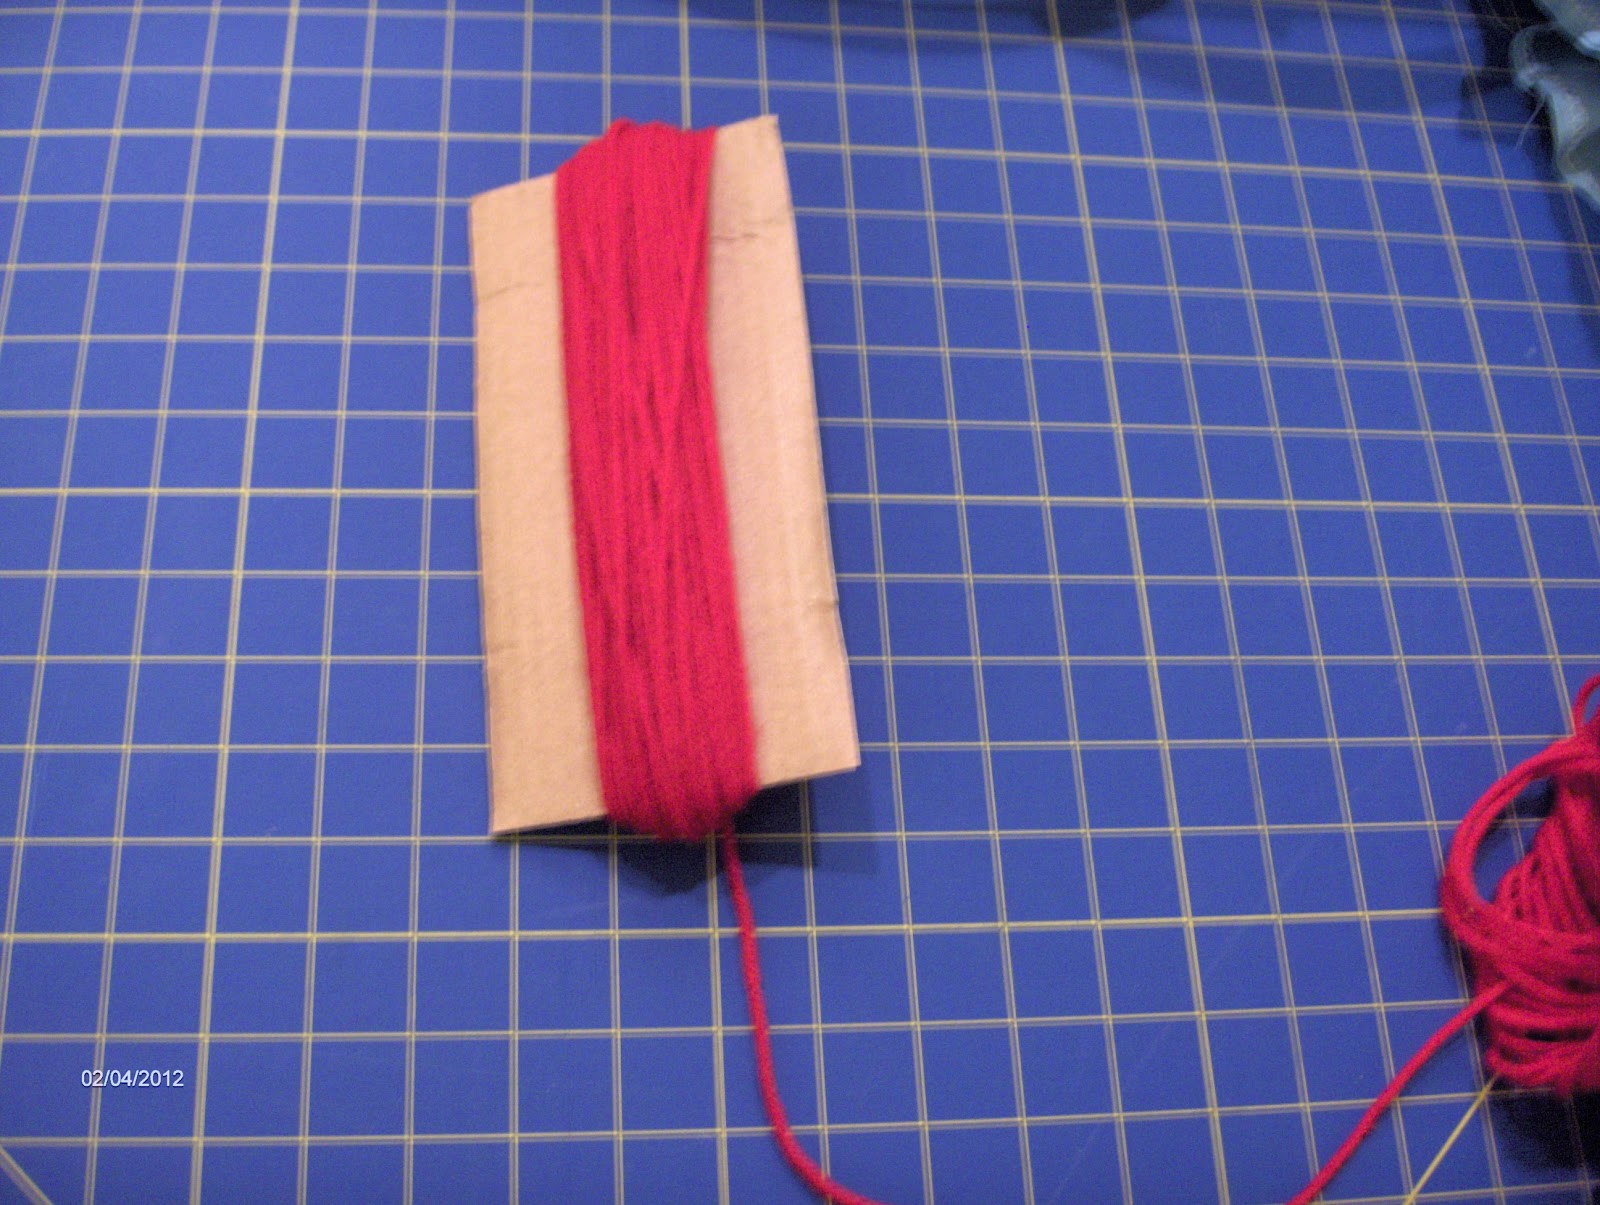
I made my fringe about 8" long.  I used this piece of cardboard, and wrapped my yarn around 72 times.  Then I cut the yarn at that bottom edge - ALL the strands of yarn.  It looked like this:
Part of me thinks this would make some pretty stylin' hair for a punk rock Raggedy Ann doll...

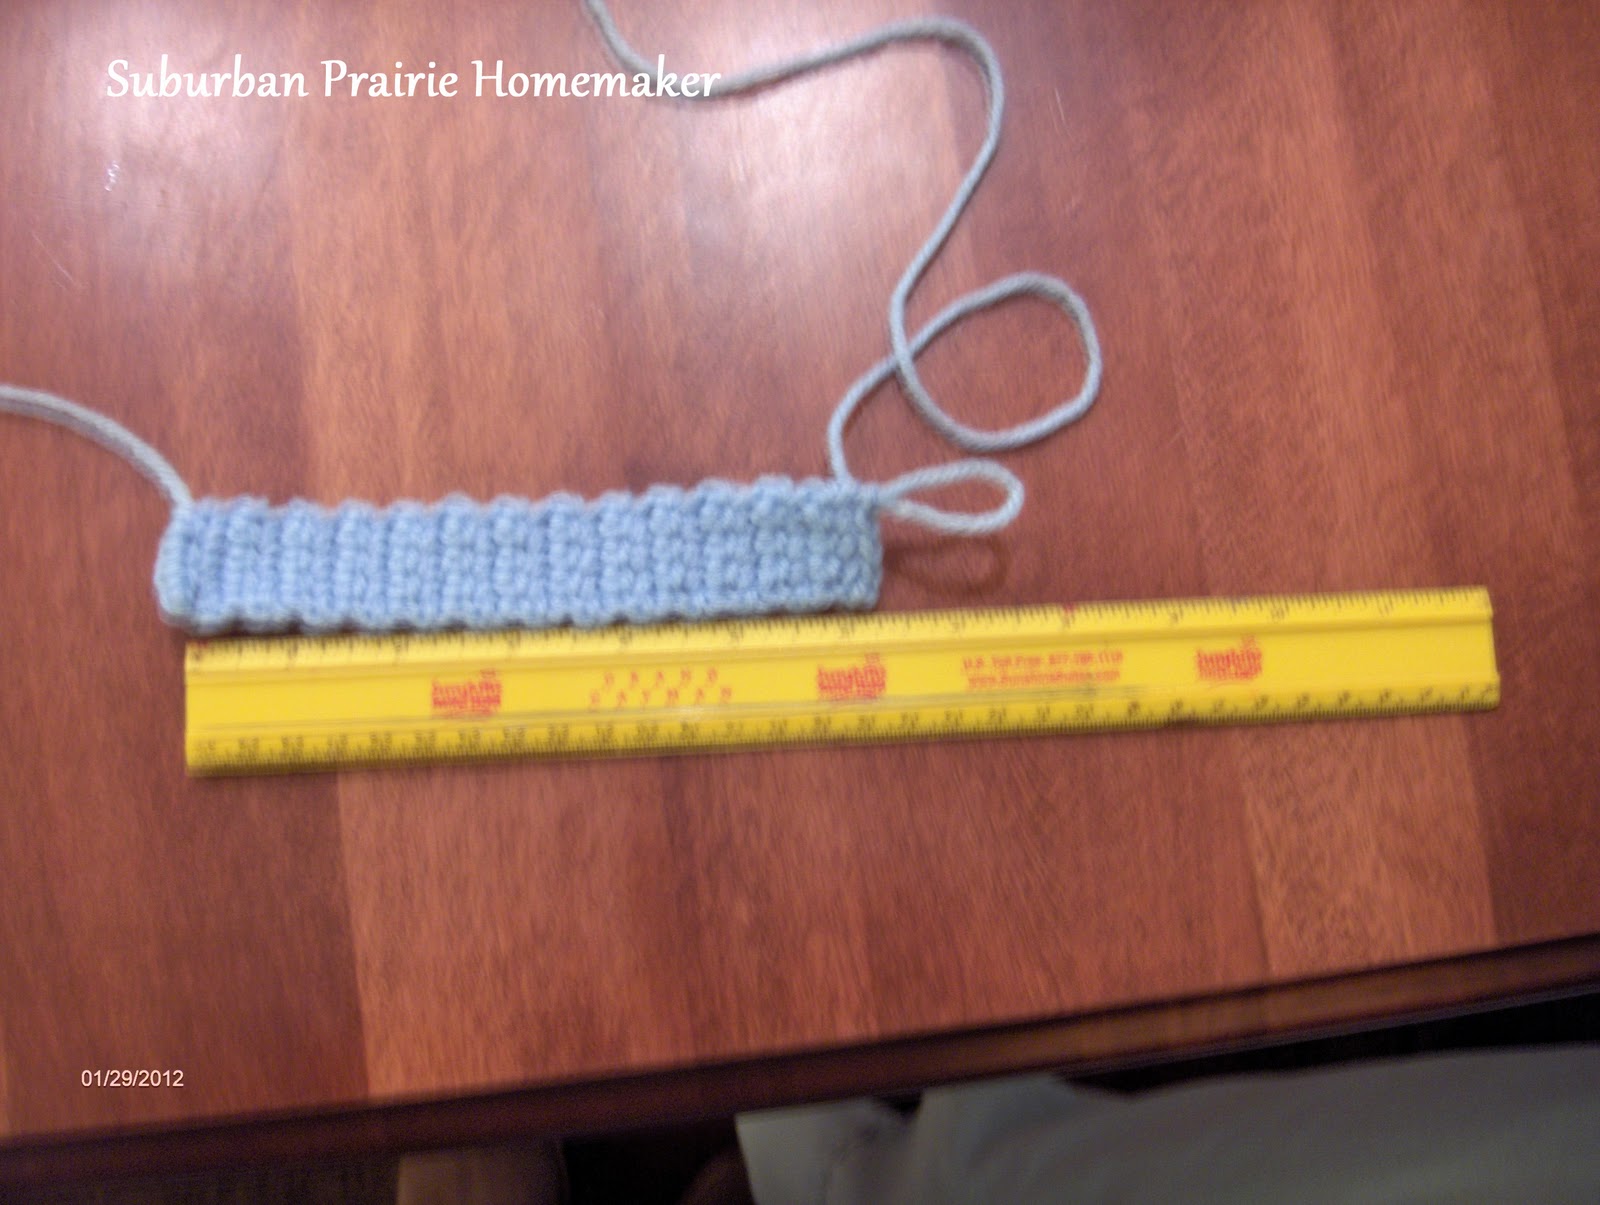
Insert your hook from front to back in the sc's on the ends.  You'll start at one end, then work toward the other.  So take two of those strands and loop them over the hook.  Pull this loop through the sc, then pull the ends through the loop.  Pull tight, and you have your first "fringe".  Repeat all the way across one end, then all the way across the other.  When you get all of them done, straighten them all out by combing through with your fingers.  Line the ends up with a ruler (I used my cutting mat), and trim them all even.

And there you have it!  The great thing about this pattern, and especially the length of this scarf - if you were to make it again, using several skeins of yarn, you'd have a really nice-sized, thick and warm afghan.  Do only 2 repeats for a skinny fashion scarf using a skein of really chunky yarn, and maybe a thin, variegated sock yarn.  Use a metallic yarn.  Play with the number of dc's and sc's - what will happen if you use 2 and 2 instead of 2 and 1?  What about 3 and 3?  What about 3 and 1?  Just so many ways to play!

Oh, and bonus!  Now that you can double crochet, you can make granny squares and you can make shell stitches.  We'll get into that more down the road.  For now, though, celebrate your new stitch and get ready for more fun!  Be proud of you!


Photobucket

Saturday, February 4, 2012

February Craftivism Challenge - HeartScarves

Did you know that heart disease kills more women each year than breast cancer?  In this season of hearts, our monthly Craftivism Challenge will be making scarves for women facing the challenges of heart disease.


Before we start, please read about the WomenHeart HeartScarves Program.  We'll be doing two scarves - one knit and one crochet.  At the end of February, we'll have a link-up party to share our projects, just like we did for our pillowcases, Little Dresses, and Boy Shorts.

You can order a kit from Red Heart Yarns - a portion of the sale is donated to the WomenHeart program, or you can use up your stash of red yarn.  Follow the pattern from the kit, follow the patterns we use here, or follow your favorite scarf pattern.  The only requirements are the size and color.

By the way, if you are going to a SuperBowl party tomorrow, but aren't that big of a football fan, this is a great project to work on between the commercials.  Who knows - you might get some of your friends interested, and start a stitching circle!

We're going to start with the crocheted scarf today, and do the knitted scarf next week.

Photobucket

Tuesday, January 31, 2012

Tea for Tuesday - Crochet Tea Cozy Tutorial

Today we're learning how to decrease for crochet, and start a really cute flower basket-type tea cozy...


The pattern we will be using is from Cute & Easy Crochet by Nicki Tench, and it starts on p. 92.  If you don't already own this book, you should pick it up.  I got mine at JoAnn's with a 40% off coupon, and I used my teacher discount.  I'm sure you can find it online as well.  There are lots and lots of really simple patterns in it, they are are all meant to be quick and easy, and yes, they are all quite adorable.  Many of the patterns call for little bits and bobs of color, so they are a great way to use up stash yarn.

So let's get started...

You can use the yarn the pattern calls for, or something of a similar weight.  I don't have wool yarn (I'm allergic), so I used two strands of regular worsted weight acrylic in a white and a pale blue.  I will also be using yarn from my stash for the roses and the leaves that are stitched onto the "basket".

For the two colors of the base, make 2 balls of yarn because you will be working with two strands throughout.  Choose one color to be the "basket" and the other to be the "filler" behind the roses.  You can use your stash to make the flowers as in the picture in the book, you can make them all one color, you can make them shades of the same color - use your imagination!

You will also need size F(5/4mm) and J(10/6mm) hooks, safety pins, and a yarn needle.

Today, we're just going to work on the base of the tea cozy.  I know you're busy, and don't have a lot of time, so we're going to break this down into some evening-size, manageable pieces.  We're also going to notch up your crochet skills a bit by learning to decrease and change color.  Next week, we'll learn some new stitches - don't worry, they're very easy.

With whatever color you choose to be the base of your tea cozy (now referred to as color A) and two strands of yarn, chain 29 with the J hook.  Measure to see if this will go round your tea pot.  Twenty-nine was fine for my tea pot.  Yours may be smaller or larger.  Feel free to add chains or make fewer chains.  Then, following the pattern, sc in second ch from hook, and each ch across.  Ch 1, turn.  Work rows back and forth until piece measures 2 1/2" (6.5 cm).  For me, this was 8 rows.  For you it may not be.  The important thing is to keep your tension even to be sure your stitches are all nice and even.  Ch1, turn.


Here is where we work the decrease.  Basically, a decrease is combining two stitches into one.  Yep, it's really that easy - let me show you.  Insert your hook into the first stitch and pull up a loop.

Just keep that loop on your hook for a moment - we're not doing anything with it quite yet.  Insert your hook into the next stitch and pull up another loop.

Now, the final step:  yo, and pull through all 3 loops on your hook.  See how it combines the two stitches into one?
Continue across the row in sc, until the last 2 stitches, then work another decrease.  It will look like this:
And here is where we will work the color change.  Go ahead and ch 1, like you are going to turn.
Pull on the loop, to make a very large loop.

Snip the top of the loop with scissors.
Remove the ends that are attached to the balls of yarn, and pull the ends on your piece tight.

To add the new color, insert your hook into the chain space.  Pull up a loop of Color B.
Ch 1 with color B, turn, and continue to work the pattern as directed in the book.  Be sure to keep your ends on the wrong side (back) of your piece, and crochet over them to work them in.  When you get to the top of the base, it will look like this:
Now, make one more, so you have 2.  Hold one of them up against your tea pot (I used my little kettle), and mark where your openings will be for the handle and spout with safety pins.
The last part of today's tutorial will be the little tab at the top.  You will only use one strand of yarn, in color B, and the size F hook.  Very simple - make a chain of 5 stitches, sc in 2nd ch from hook and across, to make 4 stitches. Ch 1, turn, and continue back and forth until your tab is 6" long (approx. 15cm).

And that's where we'll stop for now.  We'll make the flowers and get the whole thing put together next Tuesday.  Also, tomorrow, I'll be starting a ***FANTASTIC GIVEAWAY***!
Photobucket