One of the joys of doing the blog-hops is finding the real gems. The day I found this one, I actually was praying about some other variations on a butterfly that we could do for the Craftivism Challenge. And there she was, my beautiful creative angel, Marie. You DEFINITELY need to check out her blog - she has all kinds of really amazing patterns, including several butterflies! This is the pattern she wrote down for our butterfly, in UK crochet terminology. And here's my tip if you are a crocheter in the US. Copy, paste, find, replace. Yes, it's a mnemonic. Mnemonics make life easy. Copy the pattern, paste it into a word processing program, find the UK terms and replace them with US terms. Seems simple enough, right? It is.
For the little beauty above, I copied the pattern from Marie's blog and pasted it into Word. I also took out most of the photos, because I just needed a photo of the finished product to gauge my progress. I clicked the "replace" button (which automatically finds and replaces), and started with the abbreviations. I substituted sc for dc, then dc for tr. Then I substituted for the words for these symbols (single crochet, double crochet). In three easy steps I converted this fantastic little pattern into my own crochet language.
So let me share with you how I made my butterfly from Marie's pattern. If you click through, you'll see how to start a pattern with a "magic chain". Since I know we have several beginners, we'll start with what we already know from our own projects here. If you want to give the magic chain a go, feel free. It's not that difficult (or at least not as hard as most people think it is). And once you learn it, it's another tool in your crochet tool belt. In this case, I chose to do the chain option.
I used a worsted weight acrylic yarn with a J hook. Marie used a sock weight yarn with a 1.75 mm hook. You can make these with any size hook and yarn your heart desires. When you check out her pattern, you can see that with a smaller hook and finer yarn, the butterflies develop a very lacy quality. And before I forget, a yarn needle is a must!
Here we go!
Chain 6.
Yarn over (yo), and pull that loop straight through the chain on your hook. You just made a slip stitch (sl st). And you made a ring.
If you feel confident reading the pattern from here on out, go for it. If you've played along at home, you know how to read all the abbreviations. Aren't you proud of yourself?! One of the biggest hangups people have about crocheting and knitting is reading a pattern, and you can do it. You are a crocheter - hear you roar! If you're feeling a little less than confident (it is Monday, after all), we'll start together on round 1.
Chain (ch) 3. Make 2 double crochet (dc). This makes the first of 8 clusters that will go in this ring. Instead of inserting your hook into the chain itself, insert it into the open circle part of the ring. When you are done with those 2 dc, ch 2. This will act as your space between these clusters. 3 dc, ch 2 around until you have 8 clusters total. This is what it looks like going from cluster 1, which starts with the chain 3, and ending with cluster 2, which is a 3 dc cluster.
Two down, 6 to go. Remember to do the ch 2 in between each of the clusters. End with a ch 2, and sl st into the top of that first ch 3.
On to round 2. This is my little variation here. When you make the ch 3 to start round 2, turn. Yep, turn. Most of the time, when you work in rounds, you work continuously in one direction. I found things worked better if I turned at the beginning of the round.
For round 2, you are now going to turn those clusters into shells, which will double the number of stitches. This will also make your piece get ruffly. Ruffly is good. Ruffly will get your piece to fold in half when you are done to make that gorgeous butterfly. By the way, you'll get ruffly any time you double the number of stitches from one row to the next, whether it's in the round or straight, sc, dc or something fancier. Just be aware. So here's the start of row 2 so you can see how the 3 dc, ch 2 works up into the shells.
In the first ch 2 space, after you've done ch 3, turn, make 2 dc. Ch 2, 3 dc. Ch 2, then make what I call the shell: 3 dc, ch 2, 3 dc. Make one shell in each of the ch 2 spaces in round one, and connect them with a ch 2. You should then have 16 (3 dc) clusters. When you get all the way around, ch 2 and sl st into the top of your original ch 3.
See the ruffliness I was telling you about?
And guess what you'll do next? You're right - ch 3, turn! You are getting so good at this - you are thinking like a crocheter! Woo Hoo!
Let's finish up round 3. After you ch 3 turn, work 7 dc in the next ch 2 space. No ch 2's this round - nope. These are going to be another variation on a shell, with many dc's worked into one space, and then anchored in the following (or other designated) space. When you've made your first shell (your turning chain and the 7 dc), sc in the next ch 2 space. Marie used sl st. Use whichever works best for you. Just don't use anything bigger than an sc, ok. Size does matter in some cases. This is the shell...
and this the anchor stitch (remember, I used a sc and Marie did sl st).
See how that stitch holds that last end in place and makes a firm foundation for the next shell? So keep working the 8 dc in a ch 2 space, then a sl st/sc in the next ch 2 space, all the way around. It will look something like this.
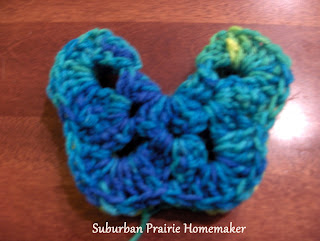
She really REALLY wants to fold up into a butterfly! Finish off, and leave a loooooong tail. You will be using this tail to sew the halves together. Wrestle your ruffles, until you fold the flower shape in half, with the top half matching where the tail is at the bottom. This is what I'm calling the front.
And this is the back.
I wove my yarn up through the center to the top, then wove it back down again. I tried to keep my stitching as inconspicuous as possible. That's one nice thing about the variegated (multi-color) yarns - they tend to hide within themselves pretty well.
I made a few overcast stitches through the tops of the dc's to secure it, then wove the end in on the underside between the wing sections. Then, I trimmed it.
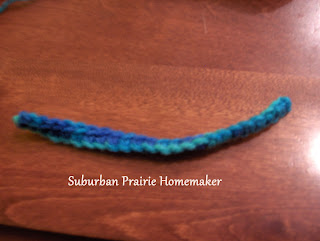
To make the antennae, I used a G hook, and chained 25. Then I worked one row of sc back to the beginning and finished off. Since I don't know how the museum intends to hang/mount the butterflies, I wanted to be sure the antennae had some stability to them. Make sure to weave in the ends.
Cut a length of yarn about 18". Thread the yarn needle with it, and keep the needle standing by. Fold the antennae piece in half, matching the center to the center of the top of the butterfly. Starting fron inside the wing, weave the needle/yarn through the back side of a few stitches, then bring it to the outside. Go through the top loops of the antennae piece to attach it.
Continue working across, stitching where you can. Try to keep your stitches as hidden as possible. Big word for the day: unobtrusive. Finish off when you get across the other side, leaving as much of the antennae free as you wish. Be sure to weave in the ends on the underside of the wings, and trim.
Try making these with a size 10 crochet cotton and a 1.50 mm hook. Make them with a bulky yarn and a P hook. Make them with anything and everything in between, and don't forget to send them off to the museum!
And also, be sure to stop by Marie's blog and check out all her wonderful patterns. I'm heading back there myself to find a few more butterflies. Leave her a comment thanking her.
Have fun!


Now THERE is something I could make! ;) Good tip on converting from UK to US, too! :)
ReplyDeleteVery cute! I love the colors! New follower. =)
ReplyDeletewww.TheLatestFind.com
This is too cute! My mother in law loves butterflies. I should use this tutorial to make her a few for her next birthday. Thanks for linking up this week! :-)
ReplyDeleteThanks so much for sharing on Craft Schooling Sunday, keep meaning to crochet some butterflies too, so thanks for the inspiration!
ReplyDeleteAwesome post! I would love for you to link up at my via:http://ourdelightfulhome.blogspot.com/2012/03/show-me-what-you-got-linky-party-7.html
ReplyDeleteMrs. Delightful
www.ourdelightfulhome.blogspot.com
So sweet! Wish I knew how to crochet! These are adorable! Thanks for leaving such a lovely comment on my blog - I'm your newest follower :)
ReplyDeleteOh, dear, I feel a little... humiliated when I drop into such advanced crafters' blogs -- I started crocheting last summer, then I gave up and I only know how to make granny squares. I'm so ashamed of myself! :(
ReplyDeleteEleni - you should not feel embarrassed at ALL! Everyone is a beginner at one time, and if you can make a granny square, you can make these butterflies! I promise! They just have more sides.
ReplyDeleteI REALLY REALLY REALLY hope you'll give it a go - I know you can do it!
What's prettier in summer than butterflies flipping around. Love yours so very pretty, and thanks for the pattern on how to make. Great tip on converting from UK to US. Thanks for sharing your creative inspiration at Sunday's Best.
ReplyDeleteSuper cute!! Thanks so much for sharing this with us at Sharing Saturday. hope to see you again this week.
ReplyDeleteHow fun! Thanks so much for linking up on Fabulous Friday. See you again next weekend!
ReplyDeleteWarmly, Michelle
I have seen a number of crochet projects but never a butterfly. Very colorful and creative. Thanks for sharing on BeColorful's Motivated Monday
ReplyDeletepam